 ultimate-guide
Modern Native Landscape Design 2026: A Practical Guide
Table of Contents
- What Modern Native Landscape Design Looks Like in 2026
- Straight Lines, Clean Edges, and Native Plants
- Native Texas Plants for Residential Landscaping: A Regional Palette
- Low-Water Xeriscaping Design That Doesn't Look Like a Desert
- Designing for Focal Points, Structure, and Curb Appeal
- Water Management, Drainage, and Climate Resilience Beyond Drought
- Step-by-Step: Converting Your Yard to a Native Landscape
- Conclusion
- Frequently Asked Questions
Last Updated: September 13, 2026
What Modern Native Landscape Design Looks Like in 2026
Modern native landscape design builds residential outdoor spaces around plants that already thrive in a region's climate, soil, and rainfall, then shapes them with clean geometry. In 2026, that means fewer ornamental beds and more deliberate structure: straight lines, defined edges, and plant palettes drawn from what grows naturally nearby. This guide from Lawnscapingsa.com covers the plants, water strategy, and conversion steps that make it work.
The shift is not cosmetic. Homeowners face longer dry spells, higher water bills, and yards that never recovered from the last freeze. Planting species adapted to local conditions addresses all three at once, because those plants evolved to survive this climate without daily intervention.
Straight Lines, Clean Edges, and Native Plants
The defining move in modern native landscape design is contrast: rigid hardscape against loose, naturalistic planting. A straight decomposed granite path or crisp steel edging gives the eye something to follow, while native grasses and perennials spill and self-seed behind it.
Native plants rarely grow in tidy mounds, and fighting their form with constant shearing wastes time and looks worse. Instead, designers use garden structure to contain them: metal edging, concrete borders, and geometric bed shapes do the organizing so the plants can stay wild.
A few principles drive the look:
- Beds follow the architecture of the house, not the curve of the lawn
- Hardscape lines stay straight or form clear right angles
- Plantings repeat in blocks rather than scattering one of everything
- Negative space is intentional, not leftover
This style is also more forgiving than a traditional border: straight lines hide imperfect spacing, and repeating a single species in a block makes gaps less obvious.
Native Texas Plants for Residential Landscaping: A Regional Palette
Choosing native Texas plants for residential landscaping starts with matching species to your soil and sun exposure, not just to the state. The plants below handle heat, poor soil, and inconsistent rainfall, which is why they anchor most modern designs in the region.
Native Grasses, Shrubs, and Perennials That Handle Texas Heat
Grasses give a native landscape movement and winter interest. Consider these workhorses:
- Little bluestem: blue-green in summer, copper in fall, holds shape through winter
- Muhly grass: pink cloud-like seed heads in autumn, tolerates reflected heat
- Inland sea oats: shade-tolerant, arching form for tighter spaces
- Sideoats grama: low, tough, and effective on slopes
Shrubs like cenizo, agarita, and Texas sage provide evergreen structure with almost no supplemental water once established. Perennials such as blackfoot daisy, autumn sage, and mealy blue sage add color without demanding rich soil.
The Lady Bird Johnson Wildflower Center native plant database is the most reliable starting point for checking whether a species is genuinely native to your county.
Low-Water Xeriscaping Design That Doesn't Look Like a Desert
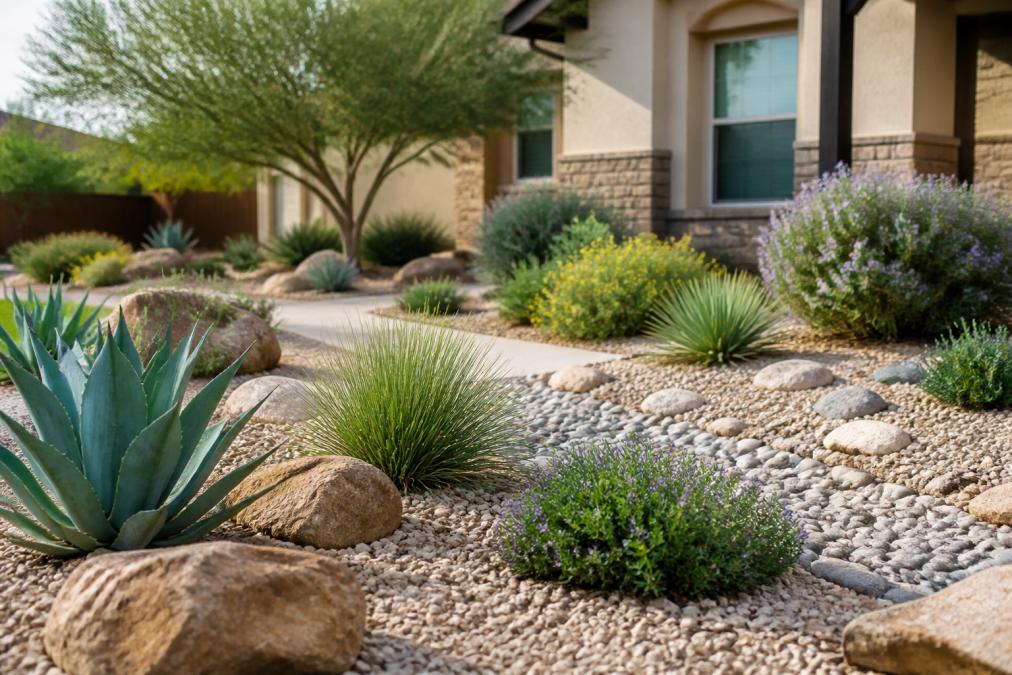
Low-water xeriscaping design fails when it becomes gravel with three lonely plants. Done well, it looks lush, layered, and deliberate. The trick is density in the right places, hardscape that reads as design rather than default, and a watering plan built around how native plants actually establish.
The single most useful tool is hydrozoning, dividing the yard into zones by water need rather than by how the beds look from the street. A common pattern is three zones:
- Zone 1 (high): the entry bed and any area visible from the front door, watered deeply once a week during establishment
- Zone 2 (moderate): foundation plantings and shade beds, watered every 10 to 14 days once established
- Zone 3 (minimal): perimeter, slope, and utility strips, watered only during the first year, then rain-fed
Grouping this way lets you run one zone heavily and leave another nearly dry, impossible when species with different needs share a bed.
Start with the soil. Native plants perform dramatically better when you work compost in before planting, because healthy soil holds moisture far longer than compacted fill. Two to three inches of compost worked into the top six to eight inches is the standard; on thin limestone soils, that step often does more for survival than any irrigation upgrade.
Mulch is the second lever. A three-inch layer of coarse native mulch or gravel mulch cuts surface evaporation and suppresses weeds that would otherwise compete for the same water. Keep mulch a few inches back from stems and trunks to avoid rot.
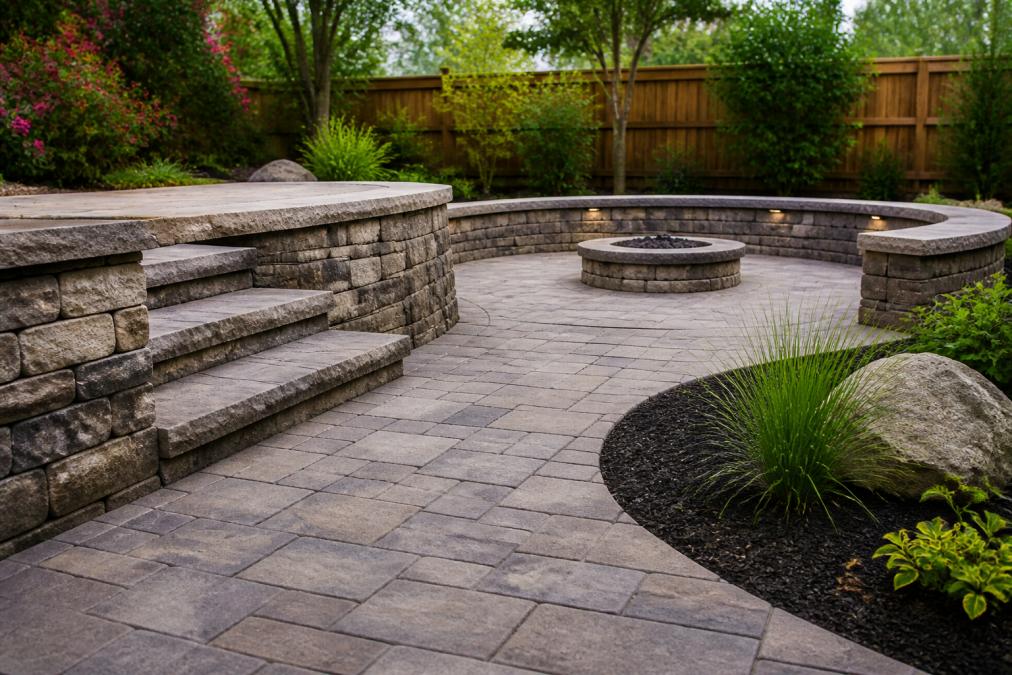
Permeable surfaces matter too. Decomposed granite, flagstone with gravel joints, and permeable pavers let rain soak in rather than run off, reducing flooding and irrigation demand. Replacing a solid concrete walkway with decomposed granite cuts stormwater leaving the property and costs less to install than poured concrete in most markets.
| Element | What It Does | Maintenance Level |
|---|---|---|
| Decomposed granite paths | Defines structure, lets water pass through | Low, occasional raking |
| Native grass blocks | Adds movement, habitat, winter interest | Cut back once yearly |
| Flagstone patio | Anchors outdoor living space | Low, occasional sweeping |
| Gravel mulch beds | Suppresses weeds, holds soil moisture | Low, top up yearly |
| Boulders and specimen plants | Creates focal point, adds height | None once placed |
Irrigation should be temporary infrastructure, not a permanent system. Drip lines on a timer for the first 12 to 24 months get new plants through establishment; after that, most native species in a well-prepared bed need little to no supplemental water outside extended drought. Leave the drip in place but capped as a fallback for extreme years.
The honest limitation: xeriscaping is lower-maintenance, not zero-maintenance. You still weed, cut back grasses, and replace the occasional plant, but you stop mowing weekly and running sprinklers constantly. Most homeowners find the workload shifts to two or three concentrated workdays a year: late winter cutbacks, spring mulch and touch-ups, and fall cleanup.
Designing for Focal Points, Structure, and Curb Appeal
A native landscape still needs a focal point, and that is where most DIY conversions fall flat. Without one, a yard reads as a collection of plants rather than a designed space.
The simplest approach is a single specimen plant or a sculptural element placed where the eye lands first, usually at the end of a sightline from the front door or a key window. A large native shrub, a cluster of boulders, or one well-placed tree can carry the entire composition.
Landscape lighting extends that focal point into the evening and adds curb appeal. Uplighting a native tree or washing a stone wall costs little to run and makes the yard look finished year-round.
Structure comes from repetition. Repeating the same native shrubs along a foundation, or the same grass along a path, creates rhythm a random mix never achieves. Structure is what makes the planting look intentional.
Water Management, Drainage, and Climate Resilience Beyond Drought
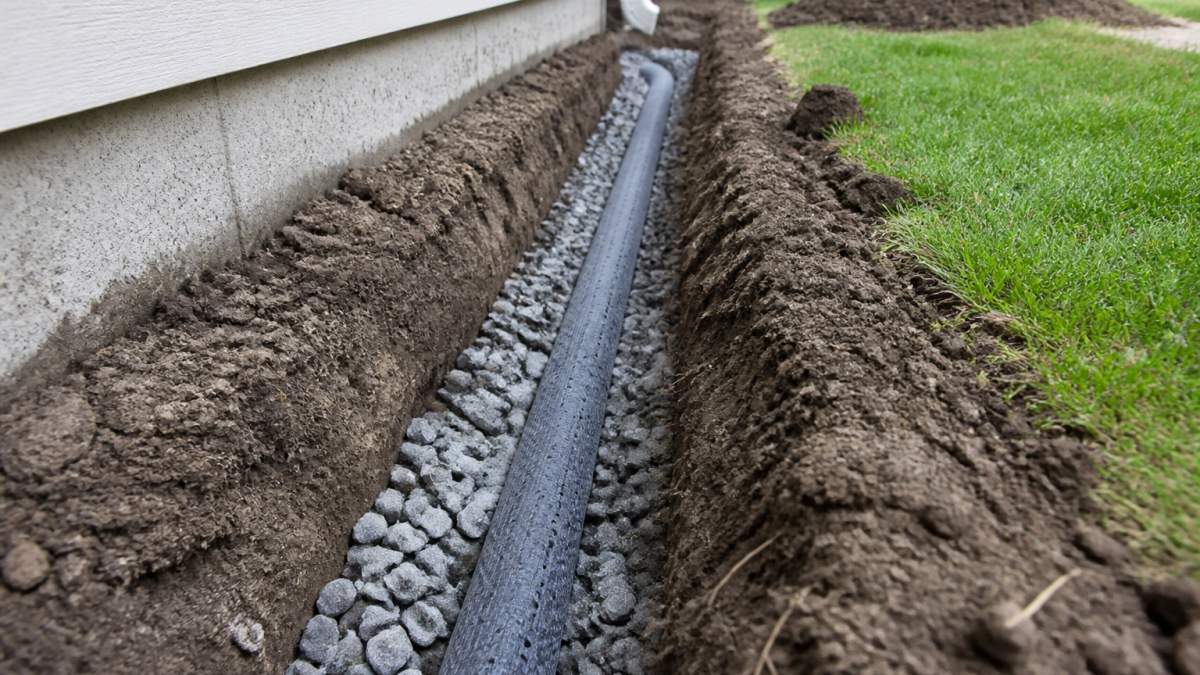
Drainage sinks more native conversions than plant choice ever will. If your yard floods after heavy rain, no amount of drought-tolerant planting fixes it. Water has to go somewhere, and native landscaping works best when that somewhere is designed.
Climate resilience now means more than drought tolerance. It means surviving extended dry periods, sudden heavy rainfall, and temperature swings that push plants past their usual limits. The U.S. Environmental Protection Agency's water-efficient landscaping guidance outlines how soil improvement, mulching, and plant selection combine to reduce irrigation demand while handling stormwater.
Practical moves that work together:
- Grade beds to direct water away from the foundation
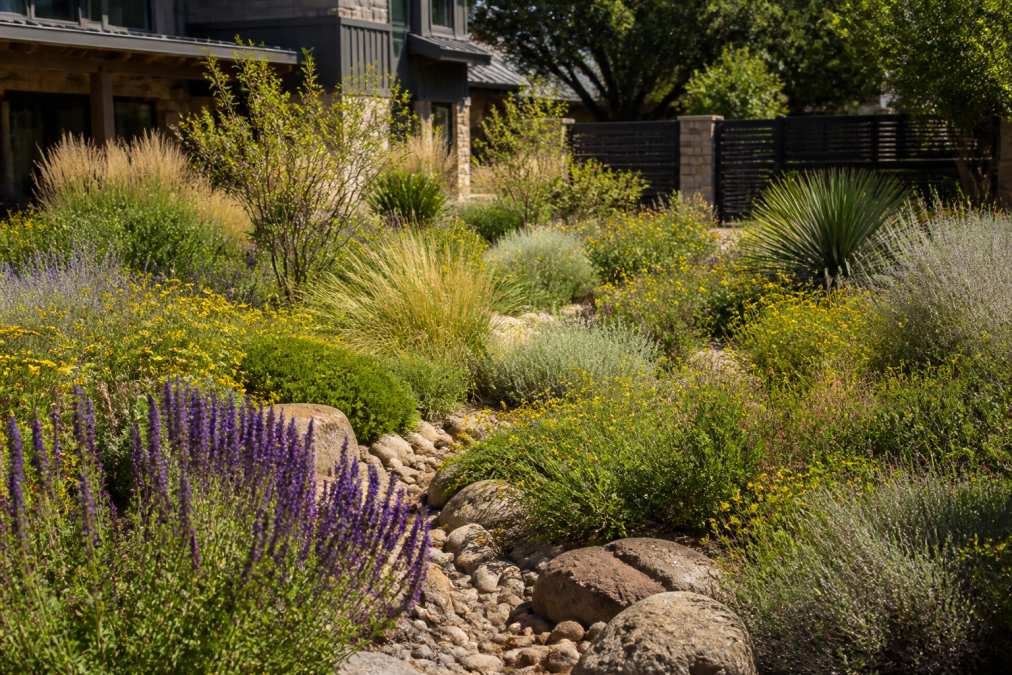
- Add a dry creek bed or swale to carry runoff to a rain garden
- Use permeable surfaces so water infiltrates instead of pooling
- Amend soil with compost so it absorbs and holds moisture
- Choose climate-adapted species with wide tolerance ranges
Step-by-Step: Converting Your Yard to a Native Landscape
Converting an existing yard is a staged process, not a weekend project. Most properties take one to two growing seasons, and phasing keeps the yard presentable throughout. The steps below are sequenced so each makes the next cheaper and easier, skipping ahead is the most common reason conversions fail.
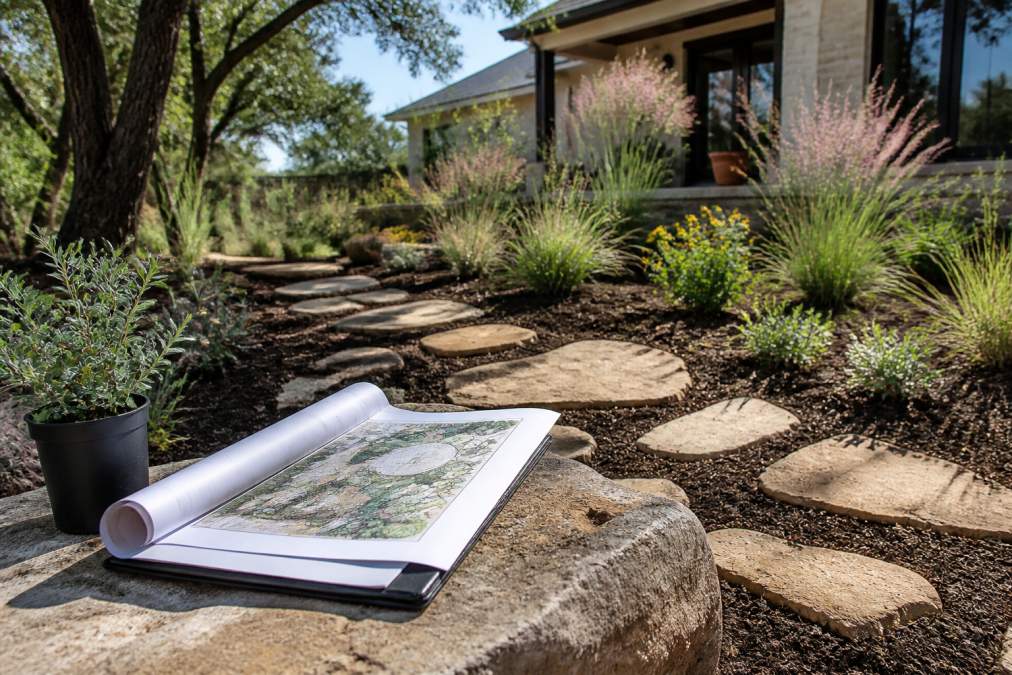
- Assess your site. Note sun exposure, soil type, drainage patterns, and any areas that flood. A simple test: dig a hole a foot deep, fill it with water, and see how long it takes to drain. If it holds water for more than a few hours, drainage work comes before planting.
- Remove invasive species. Clear out aggressive non-natives first, or they will outcompete everything you plant. Bag and dispose of seed heads, do not compost them.
- Kill the lawn without chemicals. This is the step most guides skip. Two proven methods:
- Soil solarization: mow the grass low, water it thoroughly, then cover the area with clear UV-stabilized plastic for four to six weeks during the hottest part of summer. The trapped heat kills grass, weed seeds, and many soil pathogens in the top few inches. Best for full-sun areas in July and August.
- Sheet mulching: lay overlapping cardboard (remove tape and staples), wet it, then top with two to three inches of compost and three inches of mulch. The cardboard smothers the grass underneath and breaks down within a season, feeding the soil as it goes. Best for shady areas, slopes, and any spot where plastic would be impractical.
- Fix drainage. Address grading, add swales, or install a dry creek bed before planting anything. This is the step that determines whether the rest of the project survives its first wet season.
- Improve soil health. Work compost into beds and let it settle for a few weeks if possible. On heavy clay, this is non-negotiable; on sandy soil, it is what keeps water and nutrients from draining away.
- Design the layout. Define bed shapes, hardscape lines, and the focal point before buying plants. Mark the beds with spray paint or a garden hose and look at them from inside the house for a few days before committing.
- Plant in phases. Start with trees, shrubs, and structural grasses, then fill perennials in the following season. Trees and shrubs need the longest to establish, so they go in first.
- Irrigate to establish, then back off. New plants need water for the first year or two. After that, most native species need little to none.
Budget-Conscious Implementation and Small-Space Options
You do not need a full-property overhaul to start. Phasing spreads the cost across seasons and lets you learn what thrives on your site before committing more.
For tight budgets, prioritize in this order: drainage first, soil second, structural plants third, perennials last. Perennials are easiest to add later and cheapest to replace if something fails. A practical first-year scope is one bed, the one visible from the front door, converted completely, with the rest left in turf until the following season.
Sheet mulching is the most budget-friendly conversion tool because it uses free or near-free materials. Cardboard from deliveries, arborist wood chips from local tree services, and compost from municipal yard-waste programs can cover a large bed for very little out of pocket. Solarization costs more upfront for plastic but requires almost no labor once installed.
Small urban yards and balconies can still use native design. Container plantings of native grasses and perennials work on patios, and a single specimen shrub in a large pot can anchor a small courtyard. Even a narrow driveway strip can become a pollinator corridor with the right low-growing species. The same hydrozoning logic applies at container scale: group thirstier plants in one pot and drought-tolerant species in another so you are not overwatering half the collection.
Conclusion
The hardest part of a native conversion is not the planting. It is the planning that comes first: drainage, soil, and a clear layout that gives the design structure. Get those right and the rest follows naturally.
That is exactly where professional design pays for itself. Lawnscapingsa.com brings 18 years of experience to every project, with individualized landscape design plans built around your specific soil, sun, and drainage conditions. As a woman-owned business, the team focuses on native and well-adapted Texas plants, whether your yard is bare dirt or full of struggling landscaping. If you want a plan that balances how your yard looks with how it performs, contact us to start your design consultation.
Frequently Asked Questions
What are the landscape design trends for 2026?
Modern native landscape design in 2026 leans toward clean lines, native plant palettes, and climate-adapted choices. Homeowners want yards that look intentional without heavy watering or chemical inputs. Key trends include decomposed granite pathways, specimen native shrubs as focal points, pollinator corridors, and permeable hardscape that manages runoff. Landscape lighting is also being used to highlight native grasses at night, extending the garden's visual appeal after dark while keeping maintenance low.
How do I incorporate native Texas plants into a modern landscape design?
Start by choosing a restrained palette of three to five native species that match your soil and sun exposure. Use them in repeated groupings to create rhythm, and pair them with clean hardscape edges like steel or stone borders. Native grasses such as little bluestem or muhly grass work well as mass plantings, while native shrubs like Texas sage anchor corners. The goal is to let native plants provide texture and movement while hardscape supplies the modern structure.
How can I make my native garden look intentional and modern?
Intentional native gardens rely on structure first. Define beds with crisp edges, use decomposed granite or flagstone for pathways, and repeat plant varieties in odd-numbered clusters. Add a focal point such as a specimen plant, boulder, or landscape lighting feature. Remove invasive species and keep mulch consistent. This approach signals design intent rather than letting plants grow randomly, which is the difference between a habitat garden and a messy one.
What are the benefits of low-water xeriscaping for Texas homeowners?
Low-water xeriscaping design reduces outdoor water use, which matters during Texas drought cycles and watering restrictions. Native and climate-adapted plants establish deep root systems that need less supplemental irrigation after the first year. Xeriscaping also lowers maintenance time, supports pollinators and wildlife habitat, and improves soil health. With permeable surfaces and proper grading, it can help manage drainage issues that plague many properties during heavy rain.