 how-to
How to Prevent Standing Water in Your Backyard
Table of Contents
- Why Your Backyard Holds Water After Rain
- DIY vs. Professional Backyard Drainage Solutions
- How to Fix Backyard Drainage Issues With Grading and Soil Work
- French Drain Installation: A Step-by-Step Guide
- Natural Drainage Features That Absorb Standing Water
- Legal, HOA, and Climate Considerations for Backyard Drainage
- Frequently Asked Questions
Last Updated: September 24, 2026
Why Your Backyard Holds Water After Rain
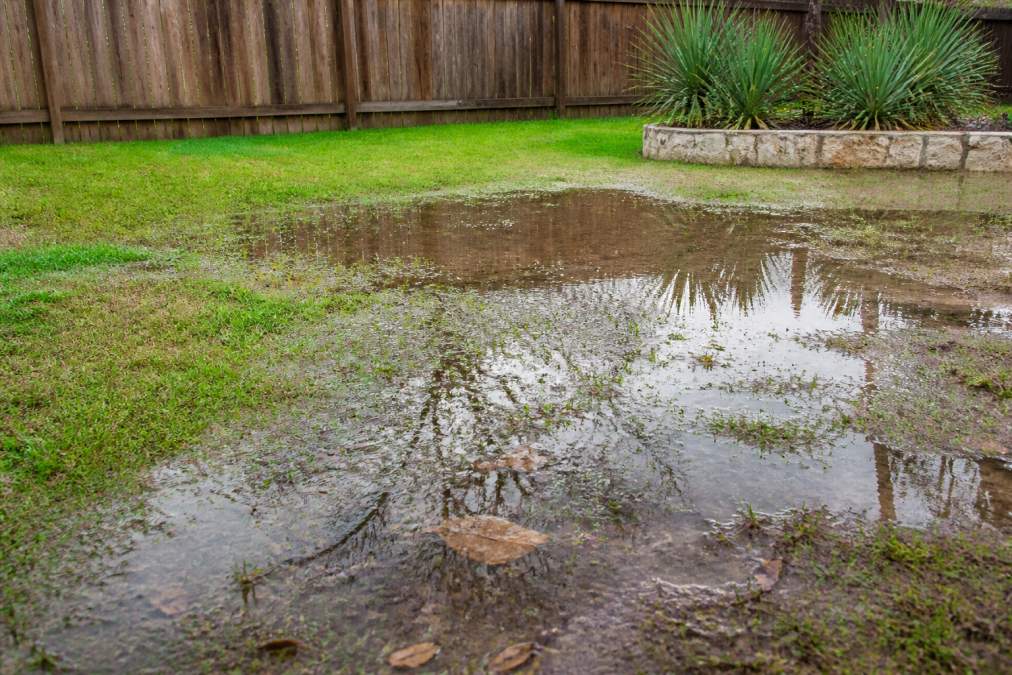
If your yard turns into a pond every time it rains, you are not alone. Standing water in a backyard is one of the most common drainage complaints homeowners face. At Lawnscapingsa.com, we have spent 18 years solving drainage problems on Texas properties, and the pattern is almost always the same: water is not leaving fast enough because of soil, slope, or both.
Start With a Symptom-to-Cause Diagnostic
Most homeowners jump straight to a solution, a French drain, a dry well, a load of topsoil, before they know what is actually failing. Use the table below to narrow down the likely cause, then run the confirmation test before you spend a dollar.
| What You See | Likely Cause | Confirmation Test |
|---|---|---|
| Puddles in the same low spot after every storm | Grading or a depression | String level across the low point |
| Water soaks in slowly everywhere, even on slopes | Compacted or clay-heavy soil | Screwdriver test and jar sedimentation test |
| Water returns hours or days after rain stops | High water table | Check whether neighbors have the same issue |
| Water pools against the foundation only | Negative slope or clogged downspouts | Walk the perimeter after a storm |
| Water appears along a property line | Neighbor runoff or a shared low point | Trace the flow path uphill from the puddle |
| Puddles form in a ring around a tree or driveway | Root-zone compaction or hardscape edge | Probe soil at the edge of the hardscape |
How Soil Type and Compaction Create Pooling
Soil compaction is the silent cause of most backyard drainage problems. When soil gets pressed down by foot traffic, heavy equipment, or years of settling, the tiny air pockets collapse, so water pools on top instead of soaking in. Clay makes this worse: its particles pack tightly, and many yards have a layer of compacted clay just below the surface that stops water cold.
Here is how to check your own soil:
- Screwdriver test. Push a screwdriver into the ground. If it stops a few inches down, you have compaction.
- Percolation test. Dig a hole about 12 inches deep and 6 inches wide, fill it with water, and let it drain. Refill it and time how long the second fill takes to drop. Under an hour is fast-draining; several hours points to clay or compaction.
- Jar sedimentation test. Fill a clear jar one-third with soil and two-thirds with water, shake it, and let it settle overnight. Sand settles first, silt next, clay last. The ratio tells you what you are working with.
- Ribbon test. Squeeze a handful of wet soil. If it forms a sticky ribbon longer than two inches, it is heavy clay.
The Role of Grading and Water Table Depth
Grading is the slope of your yard. Water always runs downhill, so if your yard is flat or slopes toward your house, it has nowhere to go. A common target is about 2% away from the foundation, roughly 2 inches of drop for every 8 feet.
Two quick tests:
- Watch where puddles form after a storm. That is your low point.
- Check if neighbors have the same problem. If they do, the issue is likely the water table, not your yard alone.
DIY vs. Professional Backyard Drainage Solutions
Here is a simple way to decide:
| Situation | Best Approach | Why |
|---|---|---|
| Small puddles, mild slope issue | DIY grading and soil work | Low cost, low risk |
| Water against the foundation | Professional assessment | Foundation damage is expensive |
| Water table or neighbor runoff | Professional drainage design | Needs engineered solution |
| Large yard, multiple low spots | Professional installation | Time and equipment heavy |
| HOA or permit requirements | Professional consultation | Rules are easy to get wrong |
If you are unsure which path fits your yard, a design consultation is the fastest way to get a clear answer. Lawnscapingsa.com offers landscape design services that start with a full site review, so you know the cause before you spend a dollar.
How to Fix Backyard Drainage Issues With Grading and Soil Work
Grading is the cheapest fix and the first one to try. The goal: move water away from your house and toward a safe exit point.
How to fix backyard drainage issues with grading:
- Find your yard's high and low points. Use a string level or a long board with a level on top.
- Aim for a slope of about 2% away from the foundation. That is roughly 2 inches of drop for every 8 feet.
- Add topsoil to low spots and rake it smooth. Pack it lightly.
- Check the slope again after rain. Adjust as needed.
- Extend downspouts at least 4 to 6 feet from the house.
Amending Clay Soil and Aerating Compacted Ground
Aeration pulls small plugs from the soil so air and water can move again. Do it in spring or fall when the ground is moist but not soaked. For clay soil, spread a 2 to 3 inch layer of compost, aged manure, or gypsum and work it into the top 6 inches to break up tight clay over time.
- Aerate once a year on compacted lawns
- Add compost every fall
- Avoid walking on wet soil, which re-compacts it
- Let grass grow taller to shade and protect the soil
French Drain Installation: A Step-by-Step Guide
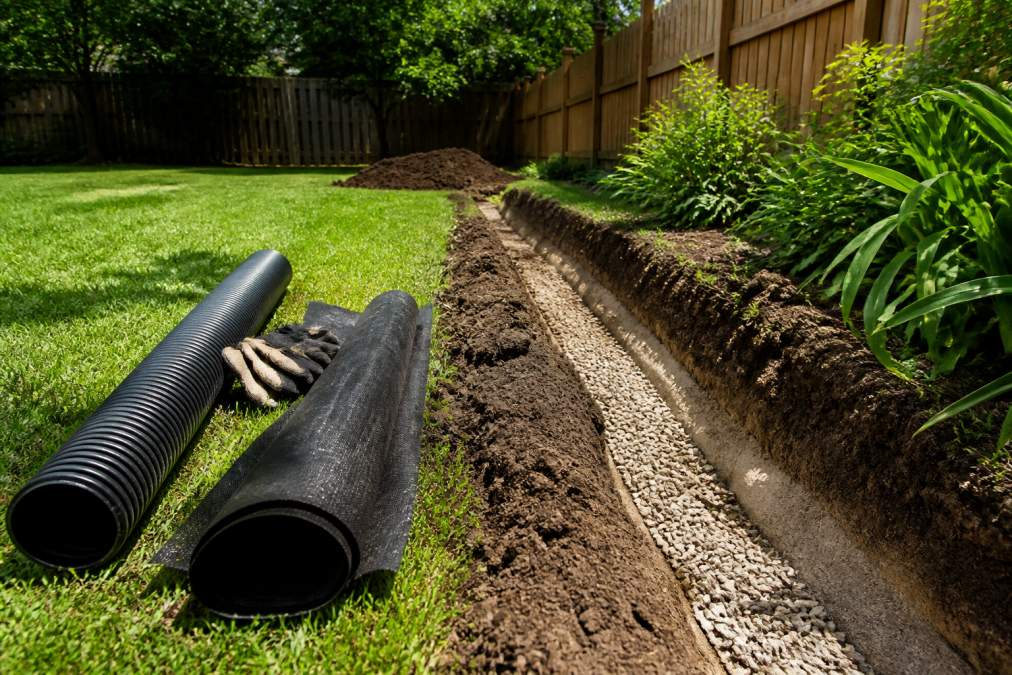
A French drain is a gravel-filled trench with a perforated pipe that carries water away underground. It handles most serious pooling problems, but most failed French drains fail on slope and outlet, not materials, so the sequence below matters more than the shopping list.
Tools and Materials You Will Need
- Perforated pipe, 4 inch diameter (rigid PVC or corrugated HDPE)
- Washed gravel, about 1 inch size (avoid crushed limestone fines)
- Landscape fabric (woven, not the thin weed-barrier film)
- Shovel or trencher
- String line and a line level
- Gloves and eye protection
Step-by-Step Installation
- Mark the trench. Run a string line from the high point of the problem area to the outlet, along the low edge of the yard rather than through the middle of the lawn.
- Set the slope before you dig. A French drain needs roughly a 1% drop, about 1 inch per 8 feet, or 5 inches over a 40-foot run. Check the string with a line level at both ends.
- Dig the trench. Width should be 12 to 18 inches; depth should put the pipe below the frost line in cold climates and at least 18 to 24 inches deep in mild ones. Keep the bottom smooth and on grade.
- Line the trench with fabric. Leave enough overhang on both sides to fold over the gravel.
- Add a base layer of gravel. About 2 to 3 inches of washed gravel, leveled to your slope.
- Lay the pipe. Perforations should face down so water enters from below and is not pushed back up by surface flow. Connect sections with matching couplings.
- Cover with gravel. Fill to within a few inches of the surface, then fold the fabric over the top to keep soil from washing in.
- Cap with topsoil and sod or seed. Leave a slight crown so the trench does not become its own low spot.
Where the Water Goes: The Outlet Problem
This is the step most guides skip, and it decides whether your drain works. A French drain that ends in the middle of the yard just moves the puddle. You need a legal, downhill discharge point:
- Daylight outlet. The pipe exits at a slope, curb, or storm drain inlet where water can flow away. This is the simplest and most reliable option.
- Dry well. A buried gravel-filled pit that stores water until it soaks away. Works well in sandy soil, poorly in clay.
- Pop-up emitter. A spring-loaded fitting at the lawn surface that opens under flow. Good for low-volume roof and downspout drainage, not for a full-yard French drain.
- Storm sewer or curb inlet. Only where local rules allow it. Many municipalities prohibit direct connection without a permit.
Common French Drain Installation Mistakes
The biggest mistake is digging a trench with no slope, water will just sit in the pipe. Aim for a 1% drop, about 1 inch per 8 feet. Other common errors:
- Using dirty gravel that clogs the pipe
- Skipping landscape fabric, which lets soil wash in
- Facing perforations up, which lets surface sediment enter the pipe
- Ending the drain nowhere, so water has no exit
- Forgetting to check where the water goes once it leaves your yard, and whether that destination is legal
- Running the drain toward a neighbor's property, which can create a liability issue
Natural Drainage Features That Absorb Standing Water
Plants and shaped ground can soak up water before it ever reaches a pipe, and they look better than a bare trench while costing less to maintain.
Rain Gardens, Swales, and Water-Loving Plants
A rain garden is a shallow planted bed that catches runoff and lets it soak in. A swale is a gentle grassy channel that guides water to a low point. Both work with nature instead of against it.
Good plants for wet spots in Texas yards:
- Gulf muhly grass
- Inland sea oats
- Texas frogfruit
- Buttonbush
- Switchgrass
Legal, HOA, and Climate Considerations for Backyard Drainage
Before you dig, check these points:
- Water diversion rules. You cannot send water onto a neighbor's property in most areas. That can lead to complaints or legal action.
- HOA rules. Many HOAs require approval for grading, trenches, and hardscaping. Get it in writing first.
- Permits. Some drainage work needs a permit, especially near property lines or easements.
- Climate. In hot, dry regions with sudden heavy rain, the ground cannot absorb water fast enough. Designs must handle short, intense storms, not steady drizzle.
For guidance on local requirements, check your city's building department and your HOA handbook. The EPA's guidance on stormwater runoff explains how runoff affects properties and why managing it matters. The USDA Natural Resources Conservation Service offers soil and water management resources for homeowners. And the FTC consumer guidance on home improvement contracts helps you understand your rights before hiring any contractor.
Frequently Asked Questions
What will soak up standing water in the yard?
Water-loving plants with deep roots, such as native grasses, sedges, and rushes, absorb significant moisture from saturated ground. A rain garden planted with these species can take in runoff from a roof or driveway within a day. For faster results, combine plants with a dry well or French drain that redirects water below the surface. Improving soil with compost also helps clay-heavy ground drain sooner.
Do rocks help with drainage in a yard?
Rocks alone do not fix standing water. A shallow layer of decorative rock can slow surface runoff, but water still pools underneath if the soil below is compacted or high in clay. Rocks work best as part of a system: washed gravel around a perforated pipe, a dry well filled with stone, or a swale lined with rock to channel water away from the house.
How to get rid of standing water in yard without a drain?
You can reduce pooling without a buried drain by regrading the yard so it slopes away from the foundation, aerating compacted soil, and spreading compost to improve absorption. Planting a rain garden or building a shallow swale also moves water naturally. Downspout extensions that carry roof runoff at least 6 feet from the house keep gutters from dumping water into the same wet spot.
When should you call a professional for yard drainage issues?
Call a professional when water pools against your foundation, when the yard stays soggy for days after rain, or when a DIY fix has not solved the problem after one season. A landscape designer can assess soil, grading, and the water table, then recommend a plan that includes French drains, catch basins, or regrading. Professional help is also worth it when HOA rules or local codes restrict what you can change.